

meta data for this page
Upload Maps to Steam Workshop
This article is being revised! Photos and text do not match in some places yet!
In this guide, you will learn how to upload your map to the Steam Workshop.
Chapters in this guide:
Preparing the upload
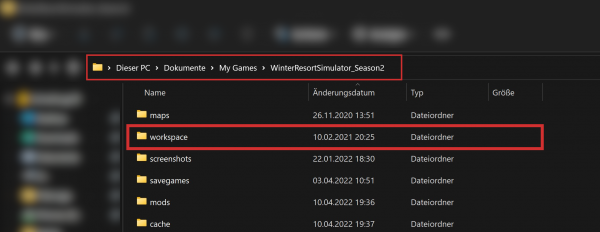
First, create a new folder named workspace within the directory Documents/MyGames/WinterResortSimulator_Season2.
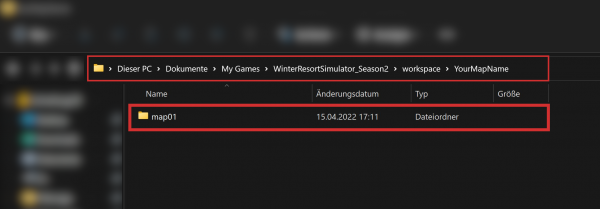
Now, create a new folder in the directory Documents/MyGames/WinterResortSimulator_Season2/workspace named with YourMapName.
Please create one folder for each Map item!

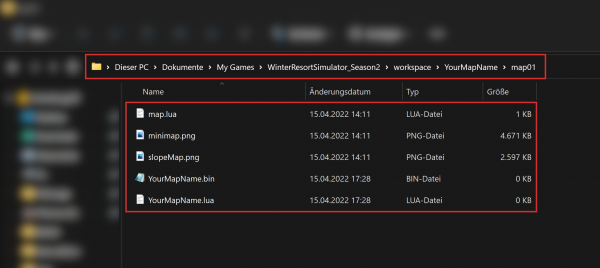
Go into YourMapName and create a subfolder named map01.
Download the WRS-Map-Template.zip if you do not have already done it.
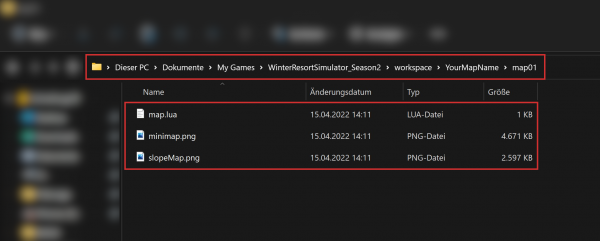
Unpack it and paste the minimap.png, slopeMap.png and map.lua into the map01 folder.
Map.lua
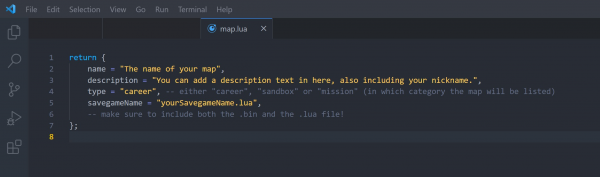
Next, open the map.lua using a suitable application (e.g. Visual Studio Code or Notepad++).
- change the name to the desired name of your map (always edit the text between the double quotes (
“). - also, please add a description to description (again in between of the double quotes).
- change the type if you like from
careertosandboxormission. - change the savegameName to the name your
Savegame.luais named (again in between of the double quotes).
This could look as depicted below:
Make sure the map01 folder contains the Savegame.lua and the Savegame.bin file.
We have finished editing the content of the map01 folder now.
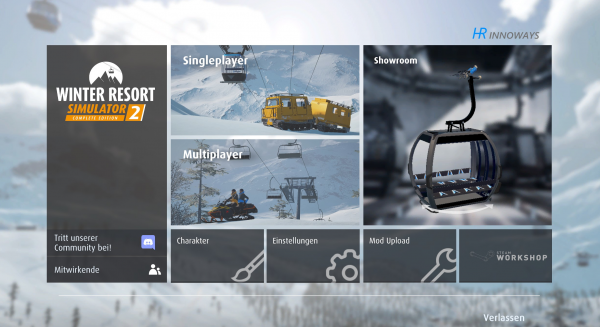
- after that, launch Winter Resort Simulator once
- upon launching, the game will create a file named
WorkshopItem.luain your new directory - as soon as you've arrived in the main menu, you can close the game again
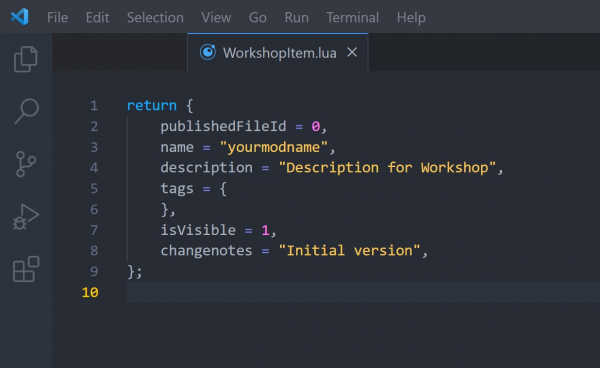
WorkshopItem.lua
Switch back to Windows Explorer. As you can see, the game has created a file named WorkshopItem.lua inside your directory.

Next, open the WorkshopItem.lua using a suitable application (e.g. Visual Studio Code or Notepad++).
- change the
nameto the desired name of your Steam Workshop item (always edit the text between the double quotes (”). This name will be visible for all players in the Steam Workshop. - also, please add a description to
description(again in between of the double quotes).
- later on, if you are updating an existing mod, you can add a description of your changes to
changenotes(one more time, between the double quotes).
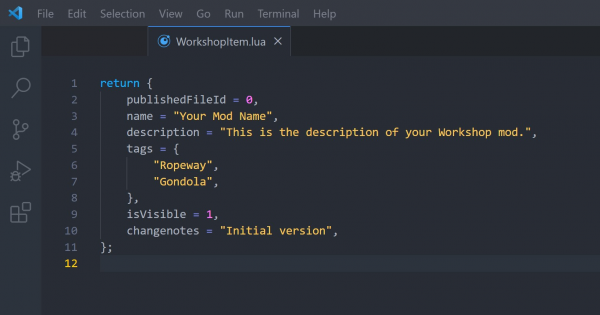
Tags
It is recommended to add some tags to your mod so that players can easily find it. If you don't specify any tags, the mod will be listed as Untagged.
You can choose one tag from each category (but you don't have to).
Category: Type
VehicleRopewayMapObjectScriptMod-PackOther ModsUntagged
Category: Vehicles
SnowcatSnowmobileSnow CannonOther Vehicles
Category: Ropeways
ChairliftGondolaAerial TramwaySurface LiftOther Ropeways
Visibility in the Steam Workshop
isVisible = 0,→ hidden, the mod is only visible for youisVisible = 1,→ public, your mod is visible for everyoneisVisible = 2,→ the mod is visible for your friends only
The visibility can be changed afterwards in Steam!
Here is an example for the workshopItem.lua:
Adding a Workshop preview image
Every mod has to have a preview image named WorkshopPreview.png inside its directory.

- the image must be named
WorkshopPreview.png, and it has to be a.pngfile.
- we recommend using a resolution of 640×360, the aspect ratio should always be 16:9.
- in case you are using a higher resolution, it can happen that the Steam upload fails with the error message
Limit exceeded.- in this case, please scale the preview image down to 640×360.
In-game Uploading
Next, please launch the game again and go to Mod Upload.
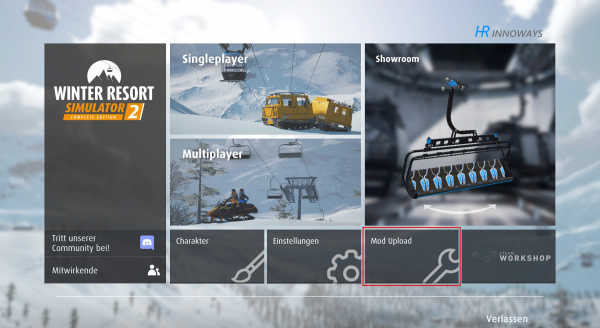
You should already be able to see your preview picture.
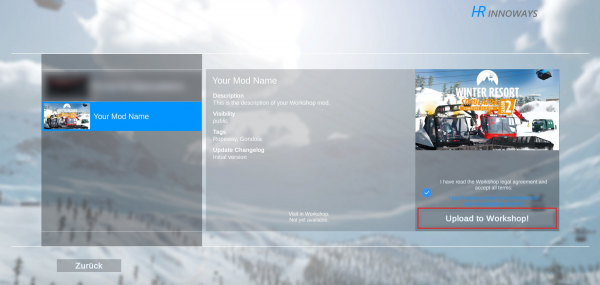
Before uploading, you need to accept the Steam Workshop legal agreement.
Please check your mod name, description, tags and visibility one more time before uploading!

Finally, press Upload to Workshop!
Note: You can add more images in Steam, same goes for videos!
Your mod will now be uploaded to the Steam Workshop!
In case you face any error messages while uploading, please ask on our Community Discord server.
Congratulations, you have successfully shared your mod with the community! It can now be downloaded by all players.
BTW: You can format your mod description in Steam: Text Formatting in Steam
Updating your Map
- replace your
YourSavegame.luaandYourSavegame.bin, you can also do the same with theminimap.pngorslopeMap.png - if you changed your mod description afterwards in Steam, copy the mod description from Steam, paste it into your
workshop.lua - at
changenotesyou can enter all changes, these are visible for everyone in Steam - now follow the chapter In-game Uploading